

Introduction
A peacock twist hairstyle is a quick and easy style for mid to long hair, usually secured with a hair clip or even sticks like chopsticks or pencils that can cause damage to your hair. The idea is to show the ends of your hair styled similar to the tail display of a male peacock.
In this step by step tutorial, you’ll learn how to create three different easy peacock twist hairstyles that don't require hairspray (or damaging clips or elastics that can break your hair).
Definitely among the most popular and easy updo styles that women have been using for decades, usually because it’s the easiest way to get your hair up and out of the way so you can get on with your day.
And, most women don’t know, it’s a protective hairstyle! Meaning, your hair doesn’t easily break with normal activity. Curly haired women are usually happy to learn that it helps preserve their natural curls.
How to Prevent Hair Damage from a Peacock Twist
Peacock twists can cause hair damage depending on how tight you're tying it. Any sort of hair-band can cause hair to be damaged from rubbing/pulling. And friction alone from hair rubbing on itself (during bedtime, for example) can be enough to break your hair if it’s extra soft and delicate.
You know your hair best - if it feels too tight, it probably is, so just try twisting your hair a little lighter until it feels right for you.
Know your length! How do you know if your hair is too long for a Peacock Twist?
You know your hair is too long for a peacock twist because the ends will hang down too far. It can feel awkward, and you may notice a bit of tugging as your hair bounces with normal head movement.
How to make a (damage free) Peacock Twist
Step 1
Gather your hair up off your neck into a ponytail. Twist your ponytail from the nape of your neck straight up, maintaining an even tension along the twist. Not too tight, remember we are preventing damage with this style.
Step 2
Continue twisting upward until you are just below the top of your head and until only a few inches remain loose on top for your “tail.”
Step 3
Now for the HairZing - Hold the first side of the comb in your dominant hand. SLIDE the first comb into your hair along your scalp so that you can feel the teeth make contact with your scalp.
Tips of the HairZing comb teeth should completely underneath the twist, and should rest more on the right side of your head.
Step 4
Reach through the stretch bands with the fingers of your non-dominant hand to hold the style in place. '
Stretch the second HairZing comb side with your other hand as far as possible before flipping it under and sliding it back into your hair.
ProTip: The Magic is in the stretch. You’ll immediately feel how comfortable it feels when the stretch activates and holds your hair.
Step 5
Apply Finishing Touches by reaching up and adjusting the hair on top until you are satisfied with your peacock twist “tail.” Make your ends/layers point straight up or flop to the sides of so they bounce and spring naturally.
How to make a Butterfly Peacock Twist to Switch it Up
What is a Butterfly Peacock Twist, exactly?
The “butterfly” term comes from a technique you can use on HairZing combs to shorten or tighten your Peacock Twist but still have it safe from damage and feel comfortable as long as you have it up.
When done correctly, your simple hair accessory doubles as a beautiful and stunning butterfly that protects your hair.
Step 1
Gather hair into a ponytail, firmly twist the ponytail from the nape of your neck straight up, maintaining an even tension along the twist.
NOTE: The longer your hair is, the LOWER on the back of your head you should start twisting your hair. Otherwise, the ends will be too long for the “tail” of the twist.
Step 2
Continue twisting upward until you are just below the top of your head and until only a few inches remain loose on top for your “tail”.
Step 3
Hold the first comb in your dominant hand. SLIDE the first comb into hair along your scalp. Tips of comb teeth should not be completely underneath the twist, and should rest more on the right side of your head.
Step 4
Reach through the stretch bands and transfer hair from left to right hand. Grasp the second comb with your left hand, and STRETCH it straight out, parallel to your left ear. Twist COMPLETELY around once (360 degrees) for a tight hold. 0
For an even tighter hold, twist the comb COMPLETELY around twice…
Step 5
Before flipping it under and sliding back into the hair, make sure the comb is in the exact same starting position with the “U” Shape of the comb curve facing upward to the ceiling.
Step 6
Reach up and evenly fan out the loose ends and wink at yourself because you’re sexy and you know it.
How to use Chopsticks for a Peacock Twist
We're a little iffy on sticking chopsticks in our mane now considering the underlying cultural appropriation context. May we suggest paint brushes now that it’s 2020?
Tips and Reminders for No-Damage Twist-up Styles
- For long sleek hair, try dampening your hair slightly for this style. It will make your ponytail easier to twist.
- For short hair, begin your twist higher in the center of your head or you could run out of hair before you reach the top of your twist.
- Make your Peacock Twists easier than ever before by creating it in seconds with the Rainbow multi-colored double comb to go with your outfit.
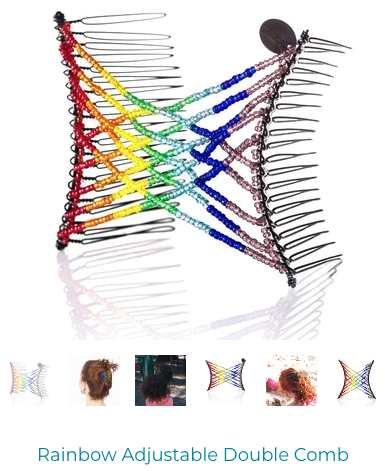
Get your Rainbow Double Comb here


)